
Ashwagandha Farming: A Comprehensive Guide
Introduction to Ashwagandha Farming
Ashwagandha (अश्वगंधा), scientifically known as Withania somnifera, is a highly regarded medicinal plant in Ayurveda, the traditional Indian system of medicine. Known for its adaptogenic, anti-inflammatory, and stress-reducing properties, Ashwagandha is often referred to as “Indian Ginseng” due to its ability to boost physical and mental health. It has gained global attention in recent years as a popular herb in wellness products, supplements, and natural health remedies.
Ashwagandha is cultivated for its root and sometimes its leaves, which are rich in bioactive compounds like withanolides, alkaloids, and flavonoids. These compounds are credited with the herb’s various therapeutic benefits, which include reducing stress and anxiety, improving memory, enhancing physical performance, and boosting immunity.
Farming Ashwagandha can be an economically viable venture, particularly given the rising demand for herbal medicines worldwide. This guide provides a detailed overview of Ashwagandha farming, from soil requirements to harvesting techniques, and discusses its economic potential.
1. Understanding Ashwagandha (Withania somnifera)
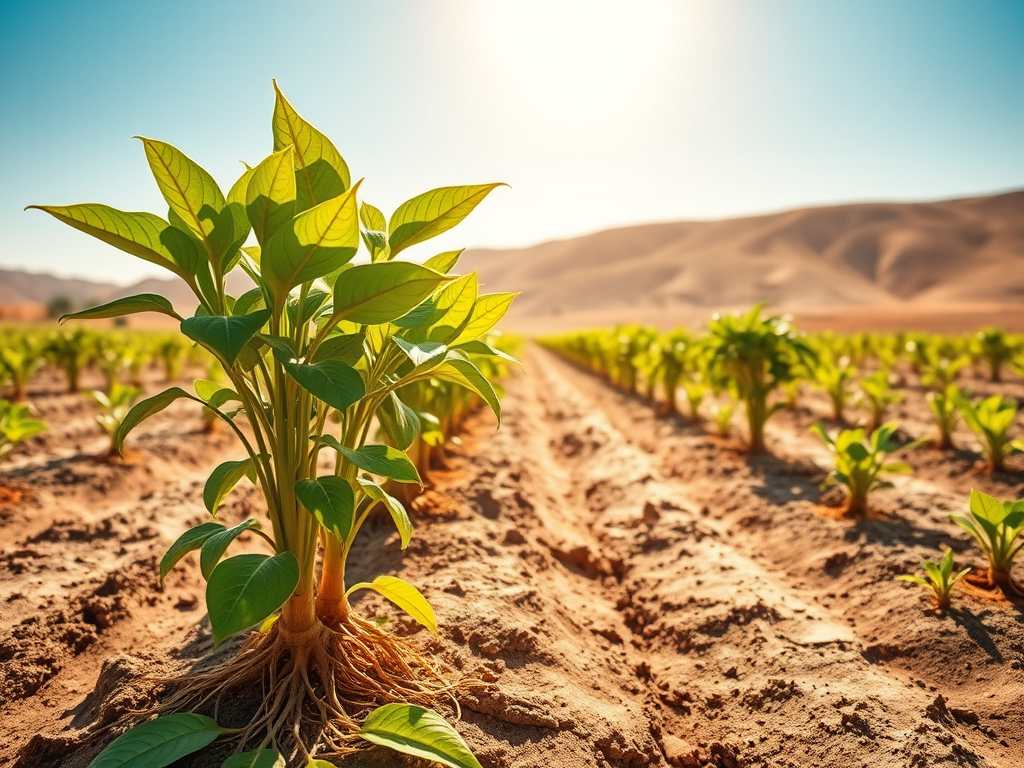
Ashwagandha is a small shrub native to the dry regions of India, the Middle East, and parts of Africa. It belongs to the Solanaceae family, which also includes tomatoes, potatoes, and eggplants. The plant produces greenish flowers and small red berries, but the primary value of Ashwagandha lies in its root, which is rich in active chemical compounds.
- Scientific Name: Withania somnifera
- Common Names: Ashwagandha, Indian Ginseng, Winter Cherry
- Medicinal Uses: Adaptogen, stress reliever, anti-inflammatory, antioxidant, and general tonic for vitality and energy.
2. Climatic and Soil Requirements
Ashwagandha thrives in hot, dry, and semi-arid climates. Its adaptability to different soil types and drought resistance makes it a perfect crop for areas with moderate rainfall and high temperatures. Here are the key factors for successful Ashwagandha cultivation:
- Temperature: Ashwagandha grows best in warm climates with temperatures between 25°C and 35°C. It is highly tolerant to heat and can survive in regions with intense sunlight and high temperatures.
- Rainfall: While Ashwagandha is drought-resistant, it grows best in regions with moderate rainfall (500 to 1,200 mm per year). It requires well-drained soil to prevent waterlogging, as it is highly sensitive to excess moisture.
- Soil: Ashwagandha prefers sandy, loamy, or well-drained soils. The soil should have a slightly acidic to neutral pH, typically between 6.5 and 7.5. It can grow in poor, dry soils and even in marginal lands where many other crops would struggle.
3. Land Preparation
Proper land preparation is crucial for the successful cultivation of Ashwagandha. Given that the plant is sensitive to waterlogging and heavy soil, the following steps should be taken to prepare the land:
- Plowing and Tilling: The soil should be plowed to a depth of about 15–20 cm to break up clumps and improve aeration.
- Soil Amendment: Incorporate organic matter such as farmyard manure (FYM) or compost to enhance soil fertility and structure.
- Creating Ridges and Furrows: Form raised beds or ridges (20–25 cm in height) with 30–40 cm spacing between rows. This facilitates proper drainage and root development.
- Soil Testing: Conduct a soil test to assess the nutrient profile. If required, apply balanced fertilizers to address deficiencies in nitrogen, phosphorus, and potassium.
4. Propagation of Ashwagandha
Ashwagandha is generally propagated through seeds, but vegetative propagation through cuttings can also be employed in some cases. However, seed propagation remains the most common method due to its ease and cost-effectiveness.
- Seed Selection: Choose high-quality, certified seeds from reputable suppliers. Healthy, large seeds tend to have higher germination rates.
- Pre-sowing Seed Treatment: Soak seeds in warm water for 12-24 hours before sowing to soften the seed coat and improve germination rates.
- Sowing Time: The best time to sow Ashwagandha seeds is during the early monsoon season, typically between June and July. This ensures that the plants are established before the harsher dry months.
5. Planting Ashwagandha
- Seed Sowing: The seeds should be sown in rows, spaced 25-30 cm apart, with 10-15 cm spacing between each seed. If sowing in the nursery, transplant the seedlings into the main field after 3–4 weeks when they are robust enough.
- Depth: Plant the seeds at a depth of about 1–2 cm. Ashwagandha requires minimal soil cover for germination, so avoid burying the seeds too deep.
- Watering: Water gently after sowing to ensure good seed-to-soil contact, but avoid over-watering. Once the plants are established, water only when the soil becomes dry to prevent root rot.
6. Irrigation and Water Management
While Ashwagandha is drought-tolerant, consistent moisture is crucial for the successful establishment of seedlings. However, the plant does not tolerate excessive moisture or waterlogging, so irrigation needs to be managed carefully.
- Initial Watering: During the germination and early growth phase, provide light irrigation once or twice a week, especially during dry spells.
- Watering Frequency: After establishment, the frequency of watering can be reduced. Watering should be done once every 10–15 days during the growing season.
- Drip Irrigation: In larger-scale farming operations, drip irrigation is recommended to ensure efficient water use and minimize water wastage.
7. Nutrient Management
Ashwagandha grows well in soils with moderate fertility, but regular nutrient supplementation can improve yields. The following guidelines for fertilization can help:
- Organic Fertilizers: Incorporate well-decomposed farmyard manure (FYM), compost, or vermicompost at the time of planting to enhance soil structure and microbial activity.
- Inorganic Fertilizers: Apply a balanced NPK fertilizer (e.g., 10:10:10) at planting and again during the growing season for optimal plant growth. Typically, 50-60 kg of nitrogen, 25-30 kg of phosphorus, and 25-30 kg of potassium per hectare is recommended.
- Micronutrient Application: Ashwagandha may benefit from the application of micronutrients such as zinc, iron, and boron, especially in areas with nutrient-deficient soils.
8. Weed and Pest Management
Weed control is crucial during the early stages of Ashwagandha growth. The plant is sensitive to weed competition, which can reduce yield and quality. Similarly, pest management is vital to ensure healthy growth and protect the crop from damage.
- Weeding: Regular weeding should be done in the first 2–3 months to prevent competition for nutrients and water. Hand weeding or using light mechanical weeding can be effective.
- Mulching: Apply organic mulch around the plants to suppress weed growth, retain soil moisture, and reduce soil temperature fluctuations.
- Pest Control: Common pests include root-knot nematodes, aphids, and whiteflies. Natural pest control methods, such as neem-based insecticides or insecticidal soap, can be used to control these pests without harming the environment.
9. Pruning and Maintenance
Ashwagandha requires minimal maintenance but benefits from occasional pruning to remove dead or diseased branches. The plant naturally maintains a compact, bushy growth habit, but selective pruning can enhance air circulation and light penetration.
- Pruning: Prune dead or damaged plant parts regularly to maintain plant health.
- Thinning: If the plants are overcrowded, thin them to ensure adequate space for each plant to grow.
10. Harvesting Ashwagandha
The primary harvestable part of Ashwagandha is the root, although the leaves and berries may also have uses in some traditional medicine systems.
- Harvesting Time: Ashwagandha is typically ready for harvest after 6–8 months of growth. The ideal time to harvest is after the plant begins to wilt, and the leaves start turning yellow, indicating that the roots have matured.
- Harvesting Process: Carefully dig up the plant using a spade or hoe. Take care not to damage the roots, as their quality is crucial for market value.
- Post-Harvest Processing: Once the roots are harvested, they should be washed to remove soil and debris. Dry the roots in the sun for 4–7 days, ensuring that they are thoroughly dried to prevent mold formation during storage.
11. Economic Potential of Ashwagandha Farming
Ashwagandha farming can be highly profitable, especially in the growing global market for herbal supplements and wellness products. Here are some economic aspects to consider:
- Market Demand: The demand for Ashwagandha is increasing due to its widespread use in stress-relief supplements, energy boosters, and herbal tonics. The rising popularity of natural and organic products is driving the market.
- Profitability: On average, an acre of Ashwagandha can yield around 300–400 kg of dried roots. At current market prices, which range
from $10 to $20 per kilogram of dried root, this could generate a substantial income.
- Value-Added Products: Ashwagandha can also be processed into value-added products such as powders, capsules, and extracts, which have higher profit margins than raw roots.
Conclusion
Ashwagandha farming offers numerous benefits, from its medicinal value to its economic potential. The plant’s resilience in arid and semi-arid regions, combined with its growing global demand, makes it an ideal crop for farmers looking to diversify their income sources. By following the best practices for cultivation, nutrient management, and pest control, farmers can successfully grow Ashwagandha and tap into the lucrative herbal medicine market. As consumer interest in natural health products continues to rise, Ashwagandha farming is poised to become a profitable and sustainable agricultural venture.

Leave a comment